News, Advice, Commercial, Residential, Restaurant
How A Live Edge Slab Gets Flattened
Have you ever wondered how a live edge slab gets flattened for furniture? Do the mesmerizing wood textures, expert finishes and one-of-a-kind patterns leave you asking — how did they do it?
At Rustix Design Studio we put years of dedication into honing our craft and eventually got the experience necessary to call ourselves professional woodworkers. But we all have to start somewhere and curiosity is the first step in the process!
At the start of the project, you have to spend a good amount of time planning and envisioning the piece you want to create in the end. Although you might have found some inspiration in a magazine, on Pinterest, or our own site, you really have to sit down and think about your budget and your specific desires.
The first part of the planning process involves deciding on the type of custom furniture piece that you want to create and the type of wood that fits your home and budget. Finally, you need to figure out how you’ll access the right tools to be safe and efficient.
The most popular types of custom furniture the ones that Rustix often receives orders for are charcuterie, restaurant tables and bar tops as well as headboards, and kitchen tables. But if we’re being honest, if you can dream it we can create it!

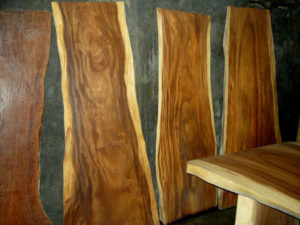
Next, you have to pick your wood and this really is the “thick” of the matter. The main types of wood used in live edge (and almost all woodwork and carpentry) are oak, pine, beech, walnut maple and beech. Oak is a staple of the industry as it is easy to cut, glue, stain and finish but sometimes lacks uniqueness for some clients. Pine is known to be very durable and resists movement and fault, plus they have loads of character. Beech designs can be, well, a beech! It is extremely strong and sometimes difficult to work with but it provides a tonne of value and character. Walnut is rare and luxurious but sometimes too expensive to get large enough slabs. And finally, maple is perhaps the best choice adding rich composition and luxury, and of course, the Canadian trademark!
The Process of Flattening Live Edge Slabs
The first thing you have to do once the piece is chosen and the material is acquired is to accurately measure the slab. Ensure to get the maximum width, length, and thickness to suit the project. This step is extremely crucial so you can know the piece intimately and can gather the rest of the tools and equipment you will use.
In our next crucial step, you have to measure the router and router bit. The router base needs to be measured along with the diameter of the router bit. You need this to confirm the dimensions of the planing sled accurately so the router base fits precisely in the sled, so it doesn’t move in unintended directions. The router bit needs to travel in a straight line on the wood surface while cutting.

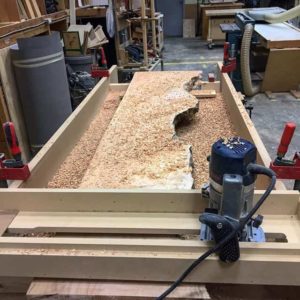
Next, we’ll build the sled. The sled measurements should also apply to your router base measurement. It should have a gap in the middle to fit in your router bit, so it should scale bigger than the router bit. Now you’ll have a flat base and two overhangs for it to be aligned on the rails. The length of the sled should then be a little bit longer than the width of the box with rails.
After this, you’ll build the box with rails. the dimensions should match the width, and the length of your box and the rails must be parallel and square. The tracks will be tall enough to accommodate the thickness of the live edge slab, the sled, and some space between both. Now you’re ready to configure all the parts and get to flattening. Ready your slab, sled, and router to shim the corners of the bottom of the slab to ensure it doesn’t tilt while working. Use a ruler to have consistency on the surface with the aid of the sled base. Ensure the router is secure on the sled and the bit protrudes nicely.
You’re ready to begin planing! Work your way from side to side slowly and vice versa. You will need to pass it several times to attain the desired result. Now it’s all about cleaning up! The amount of sawdust is sometimes intense so you’ll want to sweep up and the other cleaning job focuses on the edges of the slab where inconsistencies and rotten bark can be taken away with a chisel. You can continue to dress with tools like a belt sander.
Now that you’ve flattened the slab the journey really is just beginning. There are plenty of steps left to the treatment process so you’ll have to stay tuned! And if all this seems overwhelming, don’t worry or feel inadequate. You shouldn’t jump into a major project before you’ve done some research and know what you’re getting into. Take your time feeling out the craft and start with small projects and crafts. And if your handiwork can’t catch up to your craving for live edge give Rustix Design Studio, London, Ontario’s live edge leader a call.

